Colorful Floral Logo Design In Corel Draw
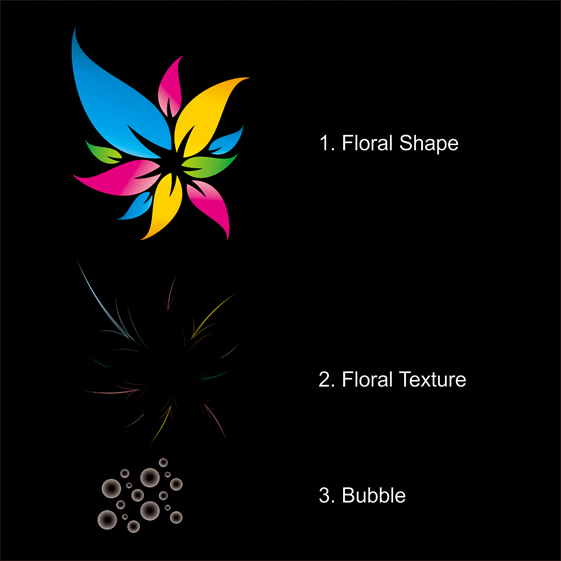
In this tutorial you will learn how to design a colorful floral logo with Corel Draw using the Bezier & Shape tool. We will create the floral shape, floral texture, bubbles & sparkles in this tutorial. The source logo file for this awesome logo design template is also available for your free download at the end of the tutorial!

Tutorial Details
- Program: CorelDraw 11 – X5
- Estimated Completion Time: 30 Minutes
Tutorial Assets
The following assets were used during the production of this tutorial.
Step 1 : Basic Elements
First of all you have to use CorelDraw with version 11+. In this tutorial I use CorelDraw X5. Let’s get started!
First take a look at the basic elements used to create our design :
Step 2 : Creating a Worksheet
Now that you know the steps and elements, we will begin.
First of all open your CorelDraw program. Now create a new file and set the paper size to A4 with a landscape view.

Step 3 : Working with the Bezier Tool
Now that we have our worksheet set, now we will begin to create the Floral Shape, using the “Bezier Tool”.
Draw a shape by using the “Bezier Tool”, point & left click to create a thin triangle shape like in the picture below.

Tip : Make sure that the last click is connected with the first click or else you
cannot put color on the shape.
Step 4 : Creating the Floral Shape
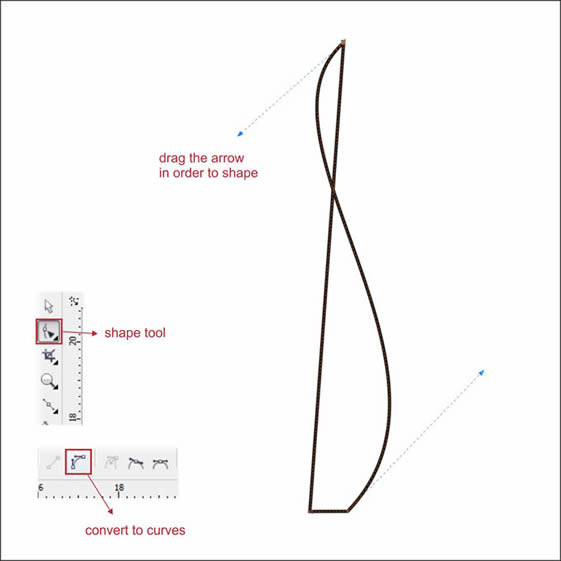
Shape the triangle by using the “Shape Tool”, It’s the second upper left toolbar.
Left click in the triangle using ” Shape Tool ” and find “convert to curves tool” at the top corner and click it.

After that you will see two dotted arrows, click and drag in order to shape it, apply this to all the lines until you make a shape like in the picture.
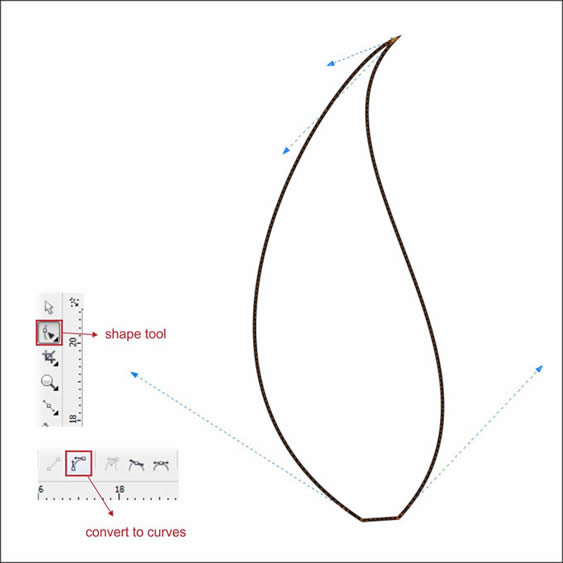
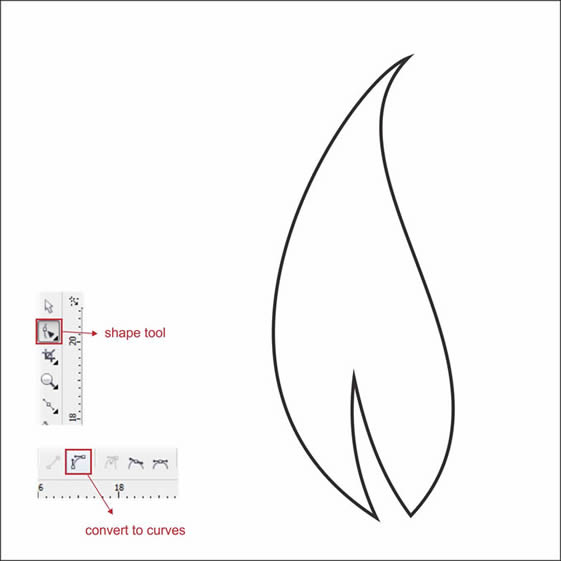
Left click and drag the bottom line in the shape using ” Shape Tool “, to create a new node and shape it using ” convert to curves “, to make it more natural.

Step 5 : Coloring the Floral Shape
Now let’s put color so it will look more natural.
Select the Floral Shape. Go to the Fountain Fill Tool, which is in the left bottom toolbar.
Choose Custom fill on the color blend and make the type Linear.
Now you will see a color box. You can change the color by left-clicking it,
fill the color with Light Blue on the left, Cyan on the middle and Dark Blue on the right.
You can make a custom fill by double-clicking at the color box.
Fill the color with Cyan on the middle left, and another Cyan on the middle right.
Two custom colors in the middle will make the color gradient softer.
Make the Gradient Angle to 27, actually you can change this as you please, but in this tutorial lets make it 27.

If you do it right it will look like this

Now using the same steps as above, create another 3 Floral shape in different colors.
Try using Pink / Purple, Green & Yellow color variations, but you can choose any color that you like.

Tip : More custom colors in the middle will make the color gradient softer.
Try to play in the light to dark color scheme, it will look more natural.
Step 6 : Creating the Floral Texture
Lets now begin to make the Floral Texture,
as now you know how to work with “Bezier Tool” & ” Shape Tool ” .
Create 5 thin Triangle with ” Bezier Tool & Shape Tool ” using the same way as Step 3 – 4.

Shape it using ” Shape Tool” and put a Light Blue color in it.

Step 7 : Transparency & PowerClip
Now that you have the Floral Texture, lets apply it into the Floral Shape.
But first we are going to make it a little transparent so it will blend nicely.
Go to Interactive Transparency Tools, it’s in the left bottom toolbar,
Left Click & Drag the Floral Texture, to the bottom, so the transparency will make it linear to bottom.
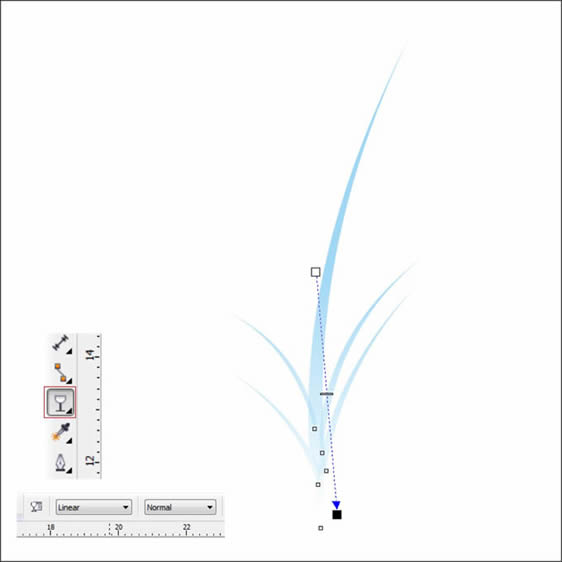
After that, we are going to insert the Floral Texture into the Floral Shape using ” PowerClip”
Left-click the Floral Texture, and then go to the top toolbar and find Effect > Powerclip > Place Inside Container.
Then you will see a black arrow, Left-click it to the Floral Shape,
and now you will see that the Floral Texture is inside the Floral Shape. You can go “inside” or “outside” the container by holding Ctrl while double-clicking it.

Apply it on the other Floral Shape, using the same ways as step 6 – 7 .

Step 8 : Arranging the Floral Shape
Now that we have 4 Floral Shape, lets arrange them into the position.
Using “Pick Tool ” click one of the Floral Shape and double Left click until you see a rotating arrow.
Left click and Drag, in order to rotate the shape.
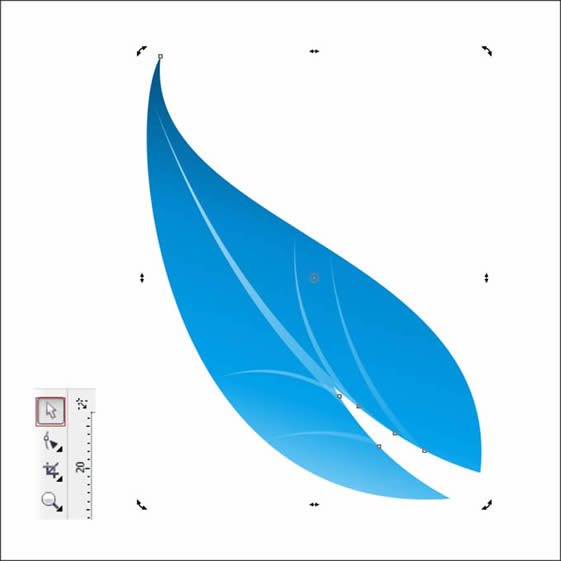
Using the same way as above, arrange the other Floral Shape into the position like below.

Copy and duplicate it using ” Ctrl + C” and ” Ctrl+ V”, to make it more dense.

Step 9 : Creating Bubbles
We are going to make the Bubbles,
Using the ” Ellipse Tool ” Left click and drag to create a circle, find it on the left toolbar.

Copy or duplicate the circle using ” Ctrl+C ” & ” Ctrl+V”, resize and arrange them like in the picture below.

Put a White Color on the Circle, and put the circle on top of the Floral Shape.

Step 10 : Transparencing the Bubbles
Now we are going to make the Bubbles Transparent, so it will look like a water drops.
Go to Interactive Transparency Tools,
in the Interactive Transparency Tools go to the upper left toolbar.
There you will see a transparency type, set it to Radial.
Step 11 : Creating Sparkle
We are going to create the sparkle to make the bubbles shiny.
Go to the Banner Shape Tool, after that go to the Top toolbar,
there we can choose the shape that we are looking for.
Choose the last shape in the toolbar, which is the exploding shape.
Final Image
And we are done, you can make it more interesting by adding background or text like the final image below


