Poster Design in CorelDraw
In this tutorial you will learn how to design a Colorful Popstyle Poster with Corel Draw. This kind of Poster works well for cute or pop style usage, as it has a cute candy feel. The source file for this awesome poster design template is also available as a free download at the end of the tutorial!

After working through this tutorial you’ll be able to create similar designs in your work.
Final Image Preview

Tutorial Details
- Program: CorelDraw 11 – X5
- Difficulty: All
- Estimated Completion Time: 30 Minutes
Tutorial Assets
The following assets were used during the production of this tutorial.
Step 1 : Basic Elements
First of all you have to use CorelDraw with version 11+. In this tutorial I use CorelDraw X5.
Okay lets get started. Let’s take a look at the basic elements used to create our design :

This also will be our steps to create the design.
Step 2 : Creating Worksheet
Okay, now that you know the steps and elements, we will begin.
First of all open your CorelDraw program. Now create a new file and set the paper size to A2,
which is a standard size for posters.

Step 3 : Creating Poster Body
Now that we have our worksheet set, now we will begin to create the Flyer Body.
Go to the “Rectangle Tool “, you can found it on the left toolbar,
make a box shape and then make the box shape resized into the same size as the worksheet
(42 x 59,4 cm)

Now let’s put color in it,
Select the Box. Go to the Fountain Fill Tool, which is in the left bottom toolbar.
Choose Custom fill on the color blend and make the type Radial.
Now you will see a color box. You can change the color by left-clicking it,
fill the color with Blue on the left, Pink on the middle and Purple on the right.
Set the Center Offset Value to Horizontal 23 and Vertical – 40.


Step 4 : Creating the Splat
We are going to create the colorful splat, using “Basic Shape Tool “,
Go to the “Basic Shape Tool “, its in the left toolbar, after you click it go to the top toolbar,
there you will see an option drop box, choose water drop shape its second from the last.
Create a water drop shape by click and drag it.

Copy, duplicate and resize it by using ” Ctrl+C” to copy and “Ctrl+V” to paste.
arrange as in the picture below.

Now create a box shape using ” Rectangle Tool “.
Go to the “Rectangle Tool “, you can found it on the left toolbar,
make a box shape and then arrange the box shape into the center of the Splat.

After select all of the Splat and the Box, then go to the upper tollbar.
There you will see ” Weld , Trim, Intersect Tool “, press the Weld Tool in order to weld it.

Now we are going to shape it, so it will look more natural.
Go to the “Shape Tool” and Right click in the Left middle lines using ” Shape Tool “
and find “convert to curves tool” at the top corner and click it.
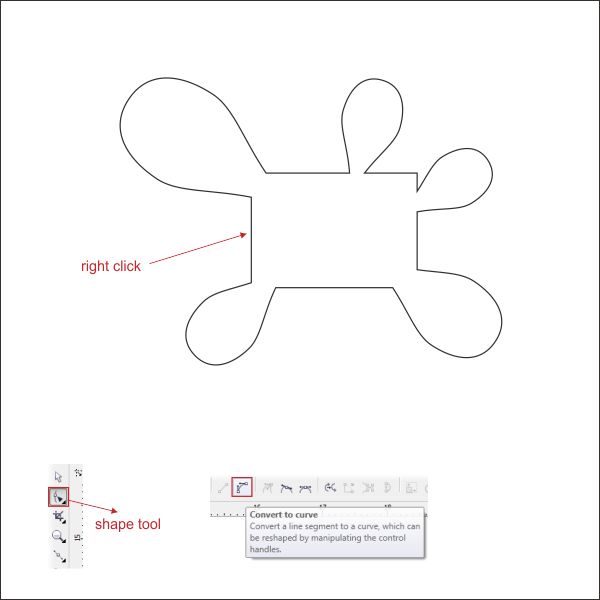
After that you will see two dotted arrows, click and drag in order to shape it,

apply this to all the lines until you make a shape like in the picture.
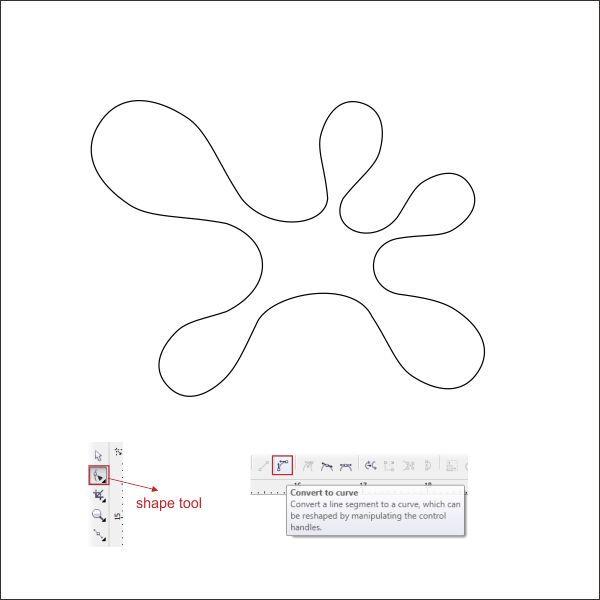
Put Blue color in it.

Copy the splat into three object by using “Ctrl+C” to copy and ” Ctrl+V” to paste,
fill the other 2 splat into yellow and green.

Step 5 : Working with Transparency
Okay now lets create an emboss effect on the splat by using “Interactive Transparency Tools”.
First of all Create a water drop shape using using “Basic Shape Tool, same as step 4

Create a box using “Rectangle Tool” on top of the water drop.

Now we are going to cut it, select both object and go to the upper tollbar.
There you will see ” Weld , Trim, Intersect Tool “, press the Trim Tool in order to cut it.
Delete the Box, we dont need it anymore.

Put White Color in it, im going to give a Temporary Blue background in it, so you can see it.
Select the shape and go to Interactive Transparency Tools, it’s in the left bottom toolbar,
Left Click & Drag the shape , to the bottom, so the transparency will make it linear to bottom.

Now after we make it transparent, arrange it to the top of the Splat.
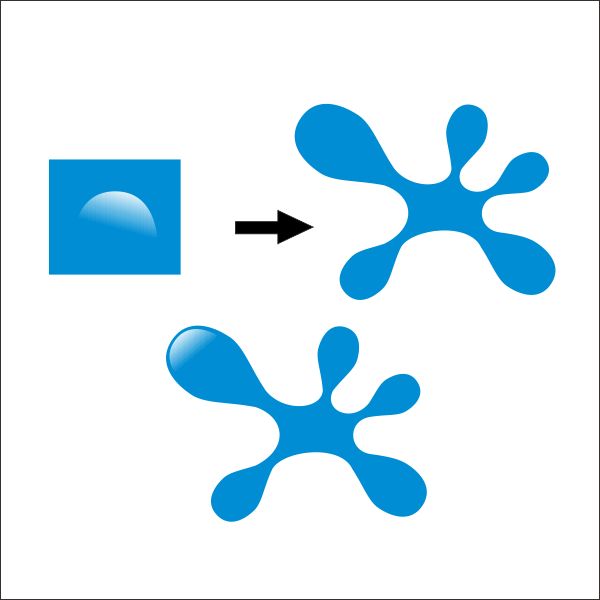
Apply to all side of the Splat, by copying the transparent shape.

Create a small water drop shape by using “Basic Shape Tool ” same as step 4.
arrange it around the Splat in order to make it more natural.

Apply the step above to the Yellow and Green Splat.

Step 6 : Working with Powerclip
Now we are going to arrange the Splat.
Arrange the Splat on top of the Poster Body, resize & arrange it like in the picture below.

After that, we are going to insert the Splat into the Poster Body using ” PowerClip”
Left-click all the Splat , and then go to the top toolbar and find Effect > Powerclip > Place Inside Container.
Then you will see a black arrow, Left-click it to the Floral Shape,
and now you will see that the Floral Texture is inside the Floral Shape.
You can go “inside” or “outside” the container by holding Ctrl while double-clicking it.

Step 7 : Creating the Rainbow
We are going to create the Rainbow using ” Rectangle Tool “.
Go to the “Rectangle Tool “, you can found it on the left toolbar, create 5 thin boxes on top of the
Poster Body.
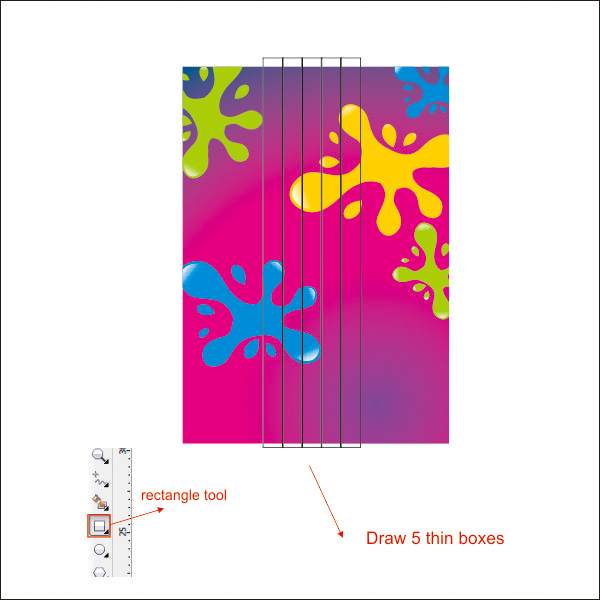
Lets shape it using, ” Interactive Envelope Tool “,
Select the 5 thin boxes and go to the ” Interactive Envelope Tool “, there you will see a shape arrow.

in the Interactive Envelope Tool, go to the top toolbar and press ” Single Arc Mode “, this will apply
curve mode for shaping,
Shape the Boxes by click and drag the shape arrow like in picture below.

Step 8 : Coloring the Rainbow
Now that we have our Rainbow Shaped. lets put color in it.
Select the First Rainbow and go to the Fountain Fill Tool, and apply the value below


Select the second Rainbow, go to the Fountain Fill Tool, and apply the value below.


Select the third Rainbow, go to the Fountain Fill Tool, and apply the value below.
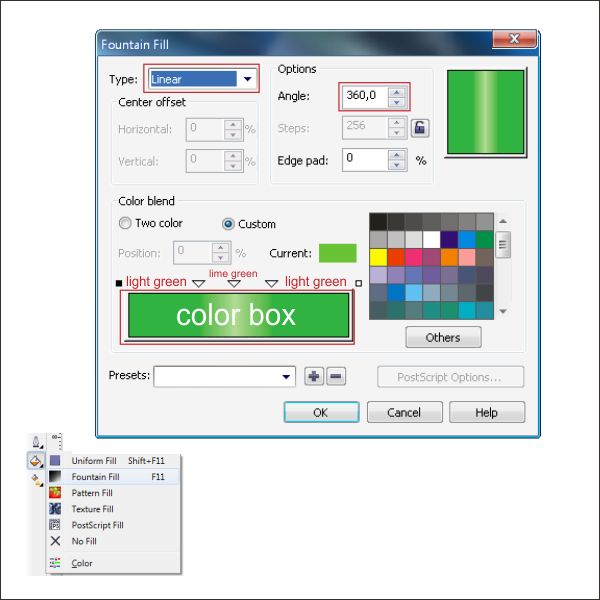

Select the fourth Rainbow, go to the Fountain Fill Tool, and apply the value below.


Select the last Rainbow, go to the Fountain Fill Tool, and apply the value below.
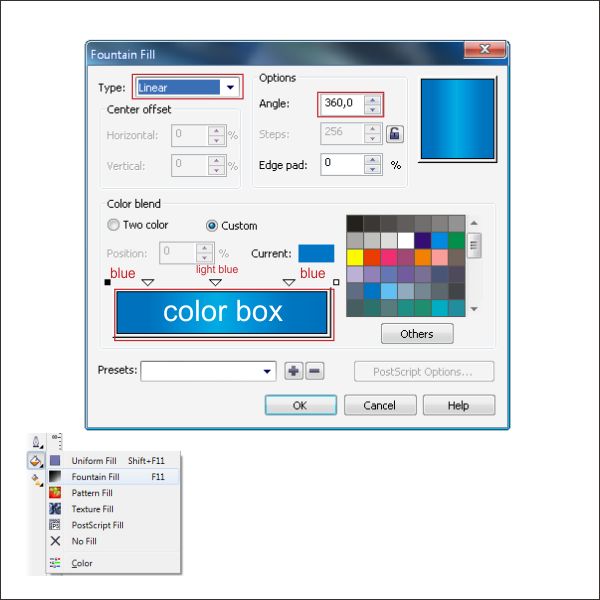

.
Now select all the rainbow, and arrange it on top of the Poster Body.

After that place the rainbow inside the Poster Body using ” PowerClip Tool ” like in step 6.

Step 9 : Creating the Heart Shape
We are going to create the Heart Shape using ” Bezier Tool “.
Draw a line by using the “Bezier Tool”, point & left click to create it.

Shape it using “Shape Tool” like in step 4. shape it untill it look like a heart shape.

Flip and copy the lines by holding ” Ctrl+Left+Right mouse ” while dragging it to the right.
Press “Ctrl+L” to combine it, and go to the “Shape Tool”
select two nodes on top of the Heart Shape and go to the uppper toolbar,
there you will see ” Join two nodes” press it on order to joining it.
If the nodes is not joining, you cant put color in it.
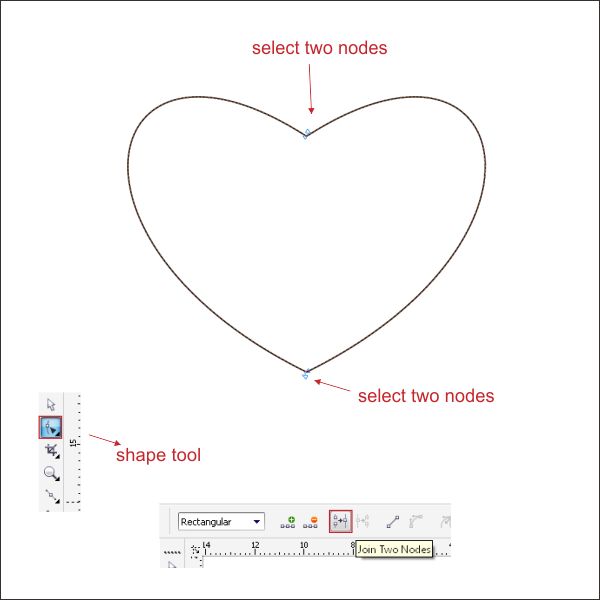
Copy and resize the heart shape, arrange it to the center make it smaller than the original.

copy another two and arrange it like picture below.
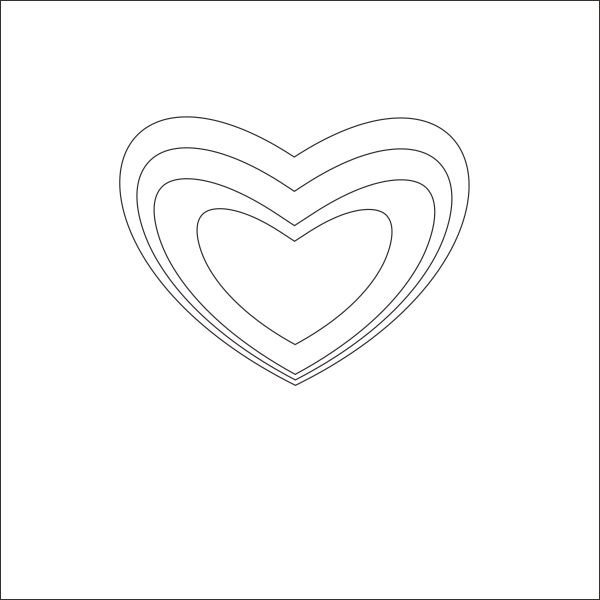
Step 10 : Coloring the Heart Shape
Now that we have our Heart Shaped. lets put color in it.
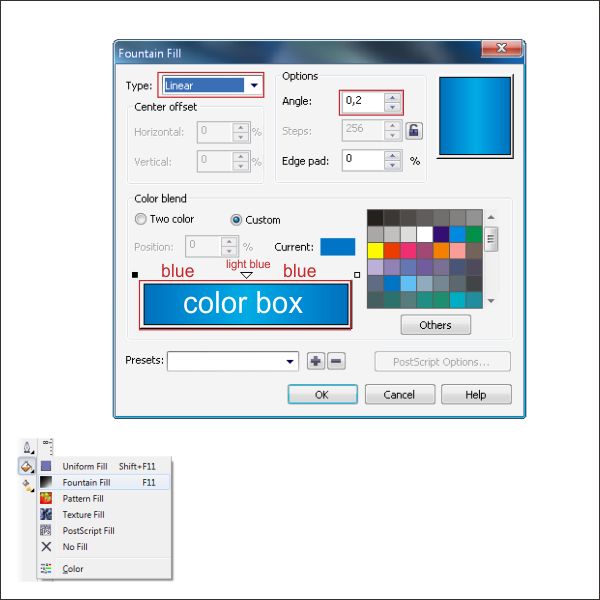
Select the First Heart and go to the Fountain Fill Tool, and apply the value below
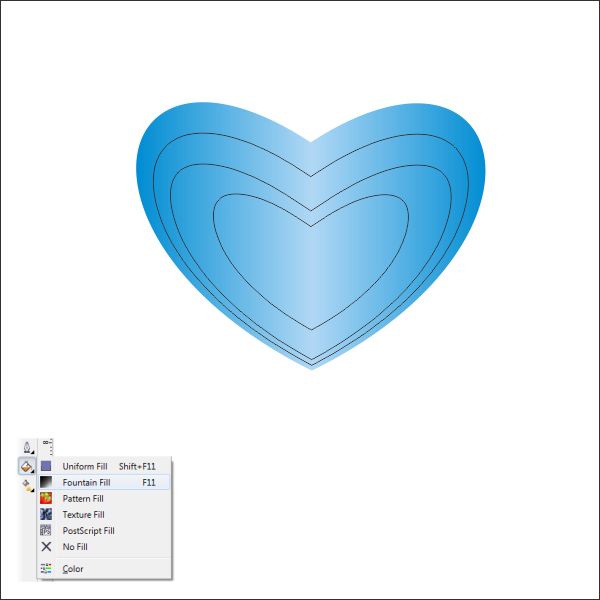
Select the Second Heart and fill it with blue purple color

Select the Third Heart and go to the Fountain Fill Tool, and apply the value below

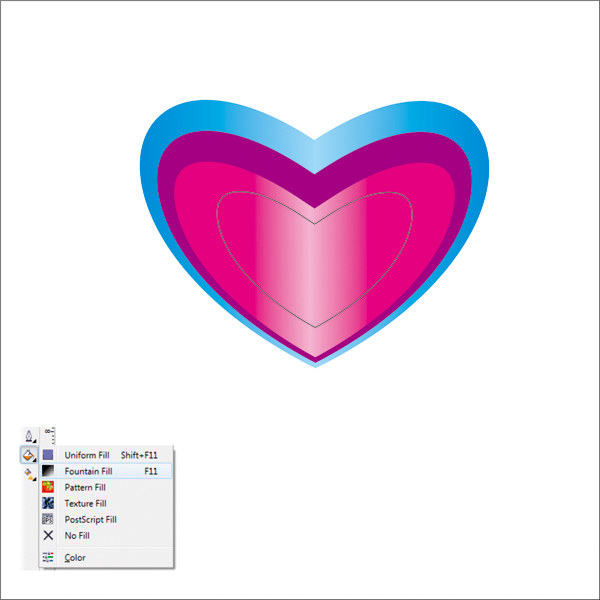
Select the Last Heart and go to the Fountain Fill Tool, and apply the value below


Now we are going to make the eyes of the Heart Shape using “Bezier Tool”
Go to the ” Bezier Tool” and create a Triangle like shape.
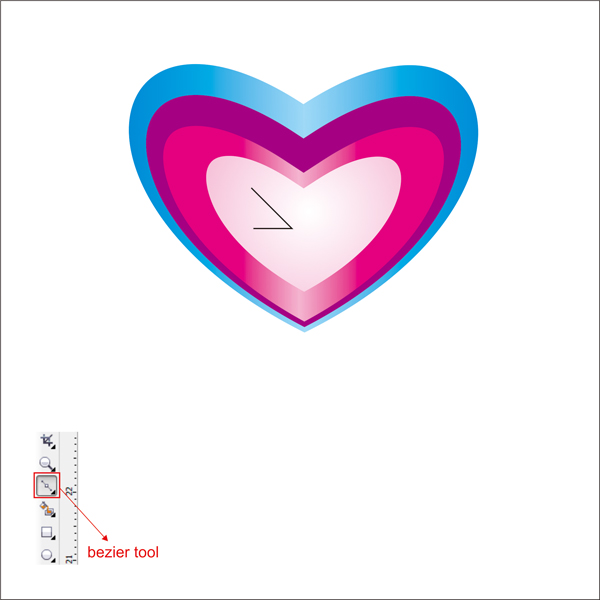
After that go to the Pen Option Tool, and apply the value below

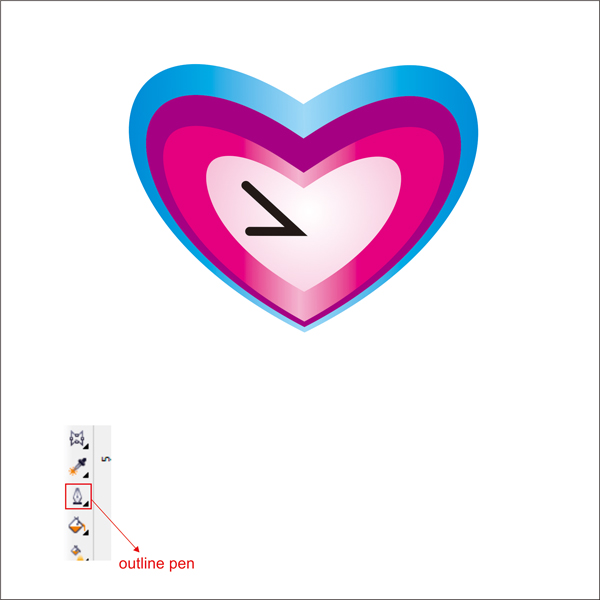
Copy and duplicate the eye and put pink color in it

Step 11 : Arranging the Heart Shape
Now that we have our Heart Shape. lets arrange it.
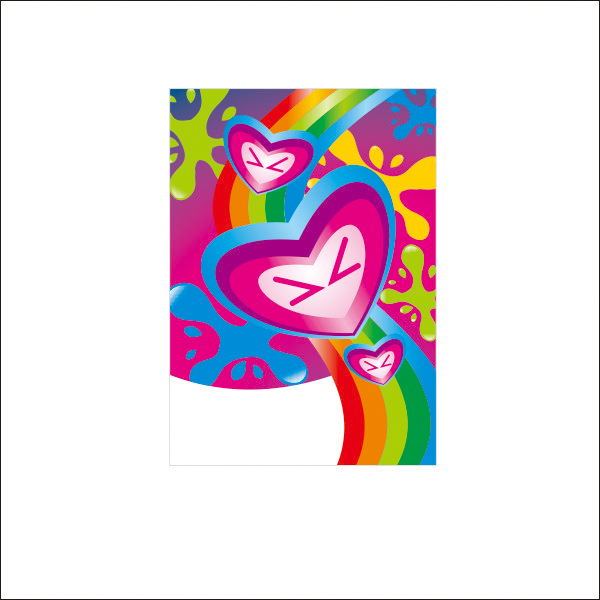
Select the the Heart Shape copy, duplicate and resize it as picture below.

Arrange it on top of the Poster Body

Draw a Box on the bottom of the Flyer Body.

Shape it using ” Shape Tool “

Put White color in it and place inside the Poster Body using “PowerClip”
Step 10 : Finishing
Now lets put some text in the poster,
Go to the “Text Tool”, in this tutorial i use “Velocity” font, but you can change it to whatever you like
type any text that you want, and place it on the white area of the Poster.

Go to the “Fountain Fill Tool” and apply the value below


Final Image
And we are done, you can make it more exciting by adding more variation, background or texture
that you can download in this website like the final image below
